
Why Your Washing Machine Hose Is a Flood Waiting to Happen
Most homeowners never give a second thought to the two hoses tucked behind the washing machine, yet those hoses hold full water pressure around the clock, even when the machine sits unused for weeks at a time. When one of them lets go, water sprays out at supply pressure and keeps coming until somebody closes a valve or the water main. Insurance carriers consistently rank supply hose failures among the most common and most expensive water damage claims in American homes, and the reason is simple: the part costs very little, but the drywall, subfloor, framing, and flooring repairs that follow a failure often run into the thousands. Late summer is a smart time to take a look, because laundry volume climbs sharply once school starts and many families are still gone on weekend trips with nobody home to hear water running. A hose that has been in service since the machine was delivered is living on borrowed time, and rubber does not announce its retirement date. This guide walks through why washing machine hoses fail, what warning signs show up before a rupture, and what you can do in an afternoon to keep your laundry room from becoming an indoor pond.
What Causes a Washing Machine Hose to Fail and Flood a Home
A washing machine hose lives a harder life than most people realize, sitting under continuous static pressure while the rubber inside slowly hardens, cracks, and loses elasticity. Every wash cycle sends a pressure spike through the line when the fill valve slams shut, and those spikes hammer the hose thousands of times over its service life. Add heat from the hot water side, mineral content from Pittsburgh municipal water, and the tight bend most hoses take against the wall, and failure becomes a matter of when rather than if. Older homes across Baldwin, Brookline, and Mount Lebanon frequently still have original rubber hoses connected to machines that were replaced twice over. The failure itself is usually sudden, splitting along a weak point or blowing off a corroded crimp fitting. Understanding the mechanism helps homeowners spot trouble long before the laundry room floor turns into a wading pool.
How a Washing Machine Hose Bursts Under Constant Water Pressure
Your home’s water supply sits at a static pressure that typically runs between 40 and 80 pounds per square inch, and that pressure never lets up on the hoses behind your washer. Unlike a faucet supply line that feeds a fixture you use for a minute or two, the washing machine hose stays pressurized every hour of every day for years. Rubber under sustained pressure undergoes a slow process called creep, where the material stretches microscopically and never fully returns to its original shape. Over time the inner liner develops fine cracks, the reinforcing fibers in the middle layer weaken, and a bulge or blister forms at the weakest point. Water pressure above 80 psi dramatically accelerates all of this, and plenty of neighborhoods in the South Hills sit at elevations where municipal pressure runs higher than manufacturers intend. A pressure reducing valve at the main solves that problem for the entire house, not just the laundry room. Once the hose wall thins enough, a single pressure spike from the fill valve closing is all it takes to open a split.
Temperature cycling makes the situation worse on the hot water side, which is why the hot hose almost always fails first in real world service. Rubber expands when hot water flows through it and contracts as the line cools between loads, and repeating that cycle thousands of times fatigues the material far faster than steady cold water does. Homes with water heaters set above 130 degrees push that fatigue rate higher still, and many older tanks in the Pittsburgh area run hotter than the owner realizes. The crimp fitting where the rubber meets the brass coupling is the most vulnerable spot, since the rubber cannot flex there and stress concentrates in a narrow band. Corrosion at that fitting is a serious warning, because rust means water has already found a path through the outer layer. When a hose fails at the crimp, it usually separates completely rather than developing a small leak. That is the difference between a damp spot and several hundred gallons on your floor.
Installation mistakes turn an average hose into a short lived one, and these mistakes are extremely common in homes where the owner installed the machine without a plumber. Pushing the washer flat against the wall kinks the hoses into a sharp bend, and a kink concentrates every bit of stress into a fraction of an inch of rubber. Manufacturers generally want at least four inches of clearance behind the machine so the hoses can curve gently instead of folding. Overtightening the coupling is the other frequent error, since cranking down on the brass fitting with a wrench crushes the rubber washer inside and distorts the seal. Hand tight plus roughly a quarter turn with pliers is all these connections need, and anything beyond that shortens the life of the washer and the fitting. Mismatched or missing rubber washers cause slow weeping that soaks the flooring behind the machine for months without anyone noticing. If you suspect moisture is already collecting somewhere you cannot see, click here for our leak detection service and let a licensed plumber find the source before it spreads into the framing.
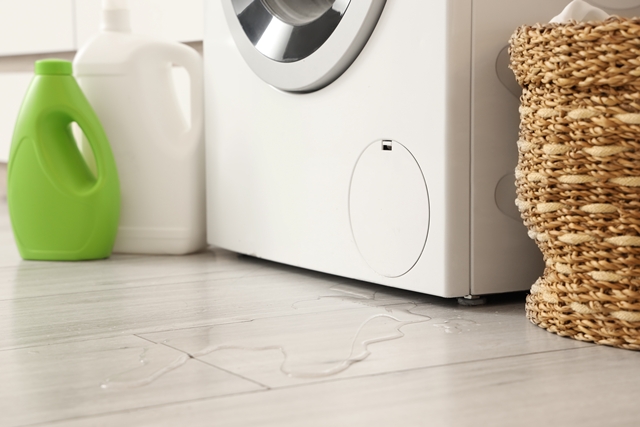
Warning Signs Your Washing Machine Hose Is About to Fail
The good news is that most rubber hoses give physical warnings weeks or months before they rupture, and a five minute inspection catches nearly all of them. Pull the machine forward far enough to see both hoses along their full length, then run your fingers down each one while the water is still on and the hose is pressurized. Blisters and bulges feel like soft lumps under the outer casing and mean the reinforcing layer has already failed underneath. Surface cracking that looks like dry skin, especially near the ends, tells you the rubber has lost its plasticizers and gone brittle. Rust or green corrosion at the brass coupling indicates water has been seeping at the crimp, and any discoloration on the wall or floor behind the machine deserves attention. A hose that feels stiff and refuses to bend easily has hardened well past its useful life. Stains on the outer braid of a stainless hose point to the same problem happening inside a fancier package.
Sound and behavior offer clues too, and homeowners who pay attention to their laundry routine often notice small changes first. A hammering or banging noise when the machine fills means the fill valve is slamming shut against a pressure wave, and that hammering pounds the hoses every single cycle. Reduced fill speed or a machine that takes noticeably longer to start a wash can point to a partially collapsed hose liner restricting flow. Dampness on the floor that appears only during a wash cycle and dries between loads is an early stage leak, not a spill from the machine. Musty odors in a laundry room, particularly in a finished basement in Ross Township or Penn Hills, frequently trace back to a slow supply leak wicking into drywall behind the appliance. Water stains on a ceiling below a second floor laundry closet are an urgent sign that should never wait for the weekend. Any of these symptoms justify shutting the valves and calling a plumber the same day.
Age alone is reason enough to act, even when a hose looks acceptable to the naked eye. Standard rubber washing machine hoses carry a recommended service life of roughly three to five years, and most manufacturers print that guidance right in the appliance manual where nobody reads it. Braided stainless hoses last longer, commonly five to ten years, but the rubber core inside that braid degrades on the same schedule as any other rubber. If you cannot remember when the hoses were last replaced, they are almost certainly overdue. Homes that were purchased with the washer already in place should get new hoses as a matter of routine, since there is no way to know their history. Write the installation date on the hose with a permanent marker so the next inspection takes ten seconds instead of guesswork. That one habit prevents more water damage than almost anything else a homeowner can do in a laundry room.
How Much Water a Failed Washing Machine Hose Releases in a Pittsburgh Home
The volume of water involved is what turns a small rubber failure into a catastrophic loss, and the numbers surprise almost everyone. A standard half inch supply line at typical residential pressure moves several gallons every minute, which works out to hundreds of gallons per hour pouring onto your floor. A hose that ruptures Friday evening in an empty house can release tens of thousands of gallons before anyone walks through the door on Sunday. That water does not politely stay in the laundry room; it follows gravity into wall cavities, down stair stringers, through floor penetrations, and into every finished space below. Basements throughout the Pittsburgh area sit partially below grade, which means water collects rather than drains once it gets down there. Homes without a functioning floor drain or sump system have nowhere for that volume to go.
The secondary damage is what drives repair costs so high, since clean water stops being clean within about 48 hours. Saturated drywall wicks moisture upward and must be cut out well above the visible water line, and wet insulation loses its value entirely and holds moisture against framing. Engineered wood flooring and laminate swell permanently and almost never recover, while solid hardwood cups and may require full replacement depending on how long it sat wet. Carpet padding acts like a sponge and traps water against the subfloor for days. Mold growth begins quickly in a warm, humid basement, and remediation adds significant cost to an already expensive repair. Furniture, stored boxes, electronics, and irreplaceable personal belongings often account for a large share of the total loss.
Where the machine sits determines how bad the damage becomes, and modern floor plans have made this considerably riskier than it used to be. Second floor laundry closets are convenient, but a hose failure there sends water through the ceiling of the living space below and potentially all the way to the basement. Laundry rooms located over a finished family room or above a garage create the worst outcomes, since the water travels through structural framing on its way down. Even a basement installation causes serious damage when the space has been finished into a bedroom, office, or home gym. Machines set on a pedestal or an unfinished slab fare somewhat better, though the water still spreads across the entire floor. A simple drain pan under the washer, plumbed to a nearby floor drain, buys valuable containment for slow leaks. It will not handle a full rupture, which is exactly why prevention matters more than damage control.
How to Prevent a Washing Machine Hose Flood Before It Starts
Preventing a washing machine hose flood costs a fraction of what the cleanup costs, and the entire project usually takes less than an hour of work. The strategy has three parts: replace the hoses on a schedule, upgrade to better materials and fittings, and control the water supply with a proper valve or an automatic shutoff device. None of this requires tearing open walls or replumbing the house, and most of it can be handled during a routine service visit. Homeowners who tackle all three parts effectively eliminate one of the most common causes of residential water damage. The work also gives a plumber a chance to inspect the surrounding supply lines, drain standpipe, and valves for related problems. Small issues found during that inspection are cheap to correct while the machine is already pulled away from the wall.
Replacing a Washing Machine Hose on a Regular Schedule
Setting a replacement interval removes guesswork, and three to five years is the right target for rubber hoses in most homes. Mark your calendar or tie the task to something you already remember, like the start of the school year or a seasonal maintenance routine. Replacement hoses are inexpensive and widely available, so cost is never a legitimate reason to postpone the work. Before you begin, close both supply valves completely and run a short rinse cycle to relieve any residual pressure in the lines. Keep a shallow pan and a towel handy, because a pressurized hose holds more water than people expect when it comes loose. Inspect the brass fittings on the machine and the valve stems while everything is disconnected, since damaged threads will prevent a good seal no matter how new the hose is.
Installation technique matters as much as the hose itself, and rushing this step undoes the benefit of the new part. Confirm that a fresh rubber washer is seated flat inside each coupling before threading anything together, as a folded or missing washer guarantees a weep. Thread the coupling by hand until it seats, then snug it with pliers about a quarter turn past hand tight and stop there. Route each hose in a gentle curve rather than a tight fold, and leave enough clearance behind the machine that pushing it back does not crimp anything. Turn the valves on slowly and watch every connection for at least a full minute, then check again after the first complete wash cycle. Feeling the fittings with a dry paper towel reveals slow weeps that your eyes will miss.
Replacing hoses is also the right moment to evaluate the rest of the laundry connection, since problems tend to cluster in this part of the plumbing system. Check that the drain standpipe is the correct height and that the discharge hose is secured rather than simply resting in the opening. Look at the supply valves themselves; old multi turn valves often seize in the open position and become useless in an emergency. Examine the exposed copper or PEX supply piping feeding the laundry box for corrosion, pinholes, or previous repairs. Homes with galvanized steel supply lines deserve a closer look, because internal corrosion in those pipes restricts flow and eventually leaks on its own. If your supply piping is aging or you have had repeated problems in this area, click here for our water supply lines service and we will evaluate the whole run rather than just the last two feet.
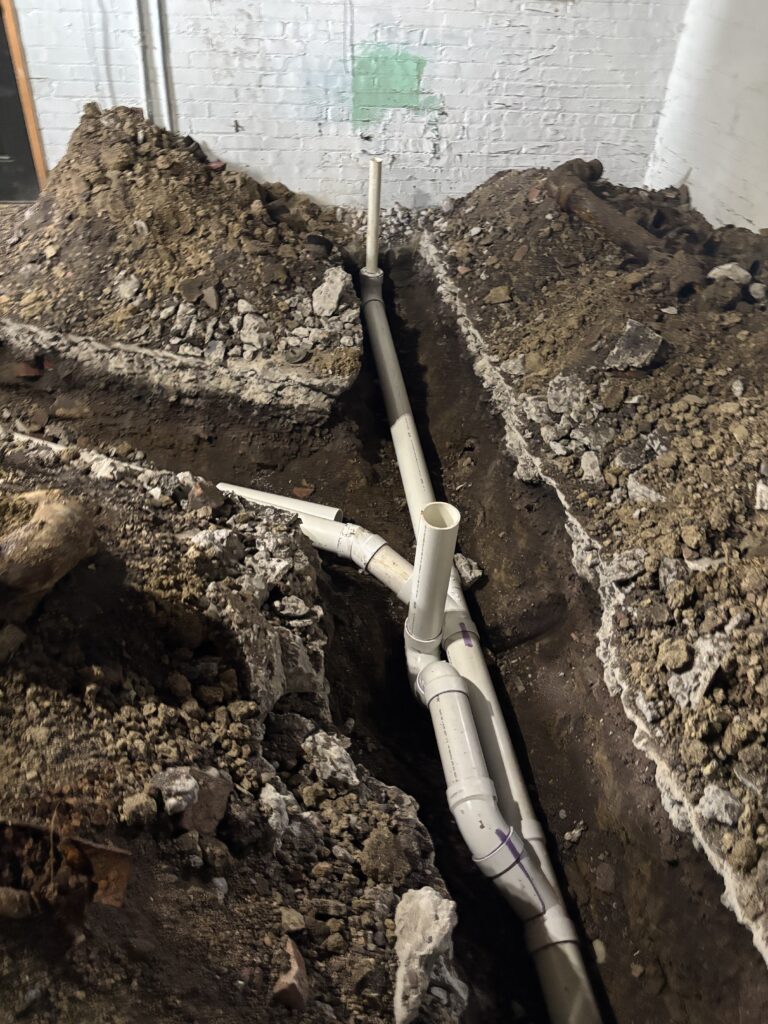
Choosing Braided Stainless Steel Washing Machine Hoses
Braided stainless steel hoses are the standard upgrade, and the reason comes down to how they contain a failure rather than how they prevent one. The braid is a woven metal jacket surrounding the same type of flexible inner core found in a rubber hose, and it resists the ballooning and blistering that precede a rupture. When the inner liner does finally give up, the braid frequently limits the failure to a spray or a weep instead of a full separation. That difference alone can turn a total loss into a wet floor and a service call. Quality varies considerably between brands, so look for hoses that carry a recognized certification and come with a meaningful warranty. Cheap braided hoses use thin wire and poor crimps, which defeats the entire purpose of the upgrade.
Braided hoses still require inspection and replacement, and this is where many homeowners develop a false sense of security. The stainless jacket hides the rubber core, so blisters and cracks that would be obvious on a plain hose stay invisible until water appears. Broken or frayed wire strands in the braid are the primary visual warning, and any bulge visible through the weave means the core has already failed. Rust staining on the braid or at the coupling indicates lower grade stainless and a hose that should come out immediately. Plan on replacing braided hoses every five to ten years even when they look fine from the outside. Handle them carefully during installation, since a sharp kink permanently damages the braid and creates a weak point that never recovers.
Automatic shutoff hoses take the concept a step further and are worth considering for high risk installations. These hoses contain a flow sensitive valve that closes when it detects the sudden high flow rate that accompanies a rupture, stopping water within seconds of a failure. They work well behind second floor laundry closets, above finished basements, and in vacation properties that sit empty for long stretches. The mechanism does need periodic testing, and some models require a manual reset after they trip. No mechanical device replaces good inspection habits, so treat these as an additional layer rather than a substitute for maintenance. Pairing an automatic shutoff hose with a quality lever valve gives you two independent ways to stop water fast.
Shut Off Valves and Leak Alarms That Stop a Washing Machine Hose Flood
The single best upgrade in most laundry rooms is a proper single lever shutoff valve, sometimes sold as a laundry valve or washing machine outlet box valve. This device controls both the hot and cold supply with one handle, which means shutting the water takes one motion instead of two frantic ones behind a machine you cannot easily reach. Old multi turn stop valves corrode internally and often refuse to close when they are needed most, and forcing a seized valve can snap the stem. Replacing those stops with quarter turn ball valves gives you positive, reliable shutoff for decades. A plumber can swap the valves and install a new outlet box in a single visit in most homes. Once the lever valve is in place, get in the habit of closing it during extended trips away from home.
Electronic leak detection adds an inexpensive early warning layer that works even when nobody is in the house. Battery powered water alarms placed on the floor behind the washer sound immediately when they contact water, which catches slow weeps long before they soak into the wall. Smart sensors connect to a home network and send an alert to your phone, which is genuinely valuable when a hose fails on a Saturday and you are out of town. More advanced systems pair a sensor with a motorized valve that closes the supply automatically the moment moisture is detected. Some of these units mount on the main water line and protect the entire house rather than a single appliance. Test the batteries twice a year and place at least one sensor at the lowest point of the floor where water will collect first.
Simple habits round out the strategy and cost nothing at all. Never run the washing machine when the house is empty, since a failure during an unattended cycle also involves an active drain and a running machine. Keep the area behind and around the washer clear so a leak becomes visible instead of soaking into stored boxes. Learn where your main water shutoff is located and confirm that it actually turns, because a valve that has not moved in twenty years may not close when you need it. Show every adult in the household where that valve is and how to operate it. Consider a drain pan under the machine if the laundry room sits above finished space, plumbed to a drain wherever possible.
Why You Need a Plumber to Inspect Your Washing Machine Hose Connections
Swapping a hose is a reasonable homeowner project, but the connections behind that hose tell a much larger story about the health of your plumbing. A licensed plumber evaluates the supply valves, the piping in the wall, the water pressure feeding the whole house, and the drain standpipe that carries away every gallon your machine discharges. Problems in any of those components can flood a home just as quickly as a burst hose, and most of them are invisible without proper tools. Pittsburgh homes span more than a century of construction methods, which means laundry connections range from modern outlet boxes to galvanized pipe stubs with valves older than the homeowner. Getting an experienced set of eyes on the whole assembly turns a guessing game into a plan. Overbrook Plumbing handles this work every day across the South Hills and beyond.
What Our Plumbers Check During a Washing Machine Hose Inspection
We start by measuring static water pressure at a hose bibb or laundry connection, because excessive pressure quietly destroys hoses, valves, and appliance fill solenoids throughout the house. Readings above 80 psi call for a pressure reducing valve at the service entrance, which protects every fixture rather than just the washer. Next we operate the laundry supply valves to confirm they close fully and reopen without weeping at the stem. Corroded, seized, or dripping valves get replaced with quarter turn ball valves that will still work in an emergency a decade from now. We inspect the supply piping feeding the outlet box for corrosion, previous repairs, and any signs of active seepage inside the wall cavity.
The drain side receives the same attention, since a laundry standpipe that backs up floods a room without any hose failure at all. We verify standpipe height and trap configuration, then check for the slow buildup of lint and detergent residue that restricts flow over time. A washing machine discharges a large volume of water quickly, and a partially clogged drain simply cannot keep up. We also confirm the discharge hose is properly secured so it cannot vibrate loose during the spin cycle. Homes with older drain lines sometimes need a cleaning to restore full capacity, and we address that during the same visit when needed. If your laundry drain is slow or has overflowed before, click here for our drain cleaning service and we will clear the line properly.
Finally, we install new hoses correctly and document what we found so you know exactly where you stand. That includes proper routing with adequate clearance, correctly seated washers, appropriate torque on every fitting, and a pressure test before we leave. We label the hoses with the installation date so the next replacement is easy to schedule. Any related concerns we notice, such as an aging water heater or corroded supply lines elsewhere, get reported clearly without pressure. You receive straightforward pricing before work begins, so there are no surprises when the job is finished. Our goal is a laundry connection you can forget about safely for years.
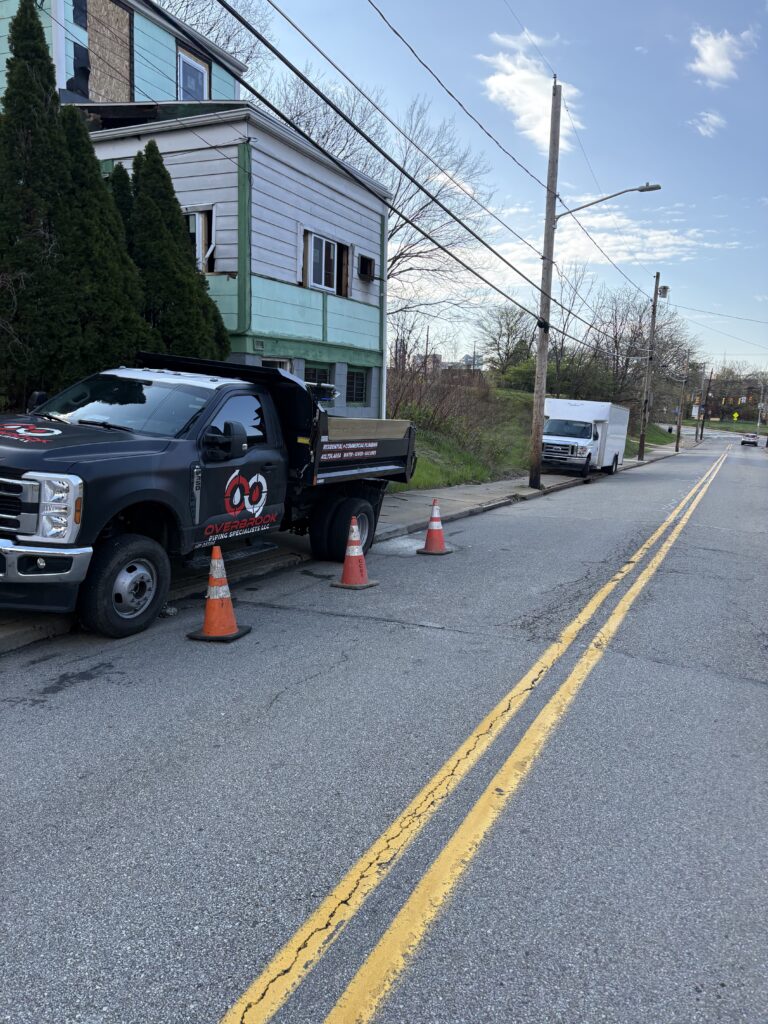
Emergency Help When a Washing Machine Hose Floods Your Home
If a hose lets go right now, close the laundry valves first, and go to the main water shutoff if those valves will not turn or you cannot reach them safely. Cut power to the area at the breaker before stepping into standing water near the machine or any outlet. Move belongings out of the water immediately, since most damage to stored items happens in the first hour. Open windows, run fans, and start removing water as soon as the supply is stopped, because drying time directly affects how much material can be saved. Photograph everything before cleanup begins for insurance purposes. Then call a plumber to find out what failed and to make sure nothing else in the system is compromised.
Overbrook Plumbing offers emergency plumbing service around the clock, and a burst supply line is exactly the kind of call we prioritize. Our trucks carry replacement hoses, valves, fittings, and the pipe materials needed to fix the underlying problem on the first visit. We repair damaged supply piping, replace failed valves, and pressure test the system before we leave so you are not waiting on a second appointment. In cases where the failure happened inside a wall or under a floor, we locate the damage accurately instead of opening drywall at random. A fast, correct repair limits the scope of the restoration work that follows.
Water damage often reveals problems that existed long before the hose failed, and those deserve attention while everything is exposed. Corroded galvanized piping, undersized supply lines, and previous amateur repairs all show up during emergency calls in older Pittsburgh homes. We explain what we find in plain language and give you options rather than pushing the largest possible job. Sometimes the right answer is a targeted repair; other times a section of pipe genuinely needs replacement. If a supply line has ruptured somewhere in your home, click here for our burst pipe repair service and we will get water back under control quickly.
Why Choose Overbrook Plumbing for Washing Machine Hose and Water Supply Line Work
Overbrook Plumbing is a local, Pittsburgh based team working out of 209 Richfield St, and we serve homeowners across Baldwin, Mount Lebanon, Bethel Park, Upper St. Clair, South Park, West Mifflin, Ross Township, and the surrounding communities. We are licensed and insured in Pennsylvania, and every technician who enters your home is trained to code and treats your property with respect. Our pricing is honest and straightforward, presented before the work starts rather than after. We offer military and senior discounts as a genuine thank you, and we back our tankless water heater installations with a one year labor warranty. Five star service is the standard we hold ourselves to on every single call, large or small.
Experience with older Pittsburgh housing stock matters more than people expect on a job like this. Laundry connections in homes built in the 1920s through the 1960s often combine several generations of materials, and knowing how to join them correctly prevents future leaks. We carry the right fittings and transition materials to make durable connections rather than temporary fixes. Our crews also understand local water conditions and pressure characteristics in different neighborhoods, which informs the recommendations we make. That local knowledge is why so many of our customers come from neighbor referrals.
A washing machine hose is one of the cheapest components in your entire plumbing system and one of the most expensive to ignore. Take ten minutes this week to pull the machine out, look at both hoses, and write down what you find. If anything looks questionable, or if you simply cannot remember the last time those hoses were replaced, let us handle it before the next load of laundry turns into a restoration project. Call Overbrook Plumbing at (412) 736-4654 or email info@calloverbrook.com to schedule an inspection, and ask about our emergency service if you need help right now. We are ready when you are, day or night.